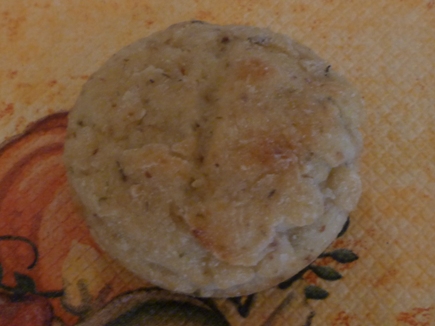
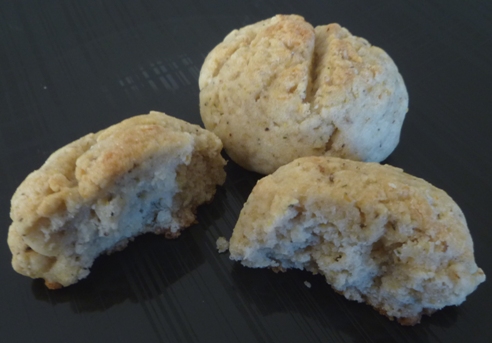
One of my favorite flavor combinations for sweet bread is orange cranberry. Since it's around the holidays and fresh cranberries are plentiful, it's the perfect time to make orange cranberry bread or muffins. I like to put my gluten-free sweet bread in muffins because it's handy for lunches and snacks and seems to bake well using small portions of dough.
I created this recipe after working with a banana muffin recipe mentioned in a previous post. I like using brown rice flour without the starch flours because it increases the nutritional values of the recipe. I changed the flavors and liquid part of the recipe.
Orange Cranberry Muffins/Bread Print Recipe
1 1/4 c. brown rice flour
3/4 t. GF baking powder
1/2 t. baking soda
1/8 t. salt
1/3 t. zanthan gun
1/4 t. cinnamon
2 eggs
1/2 c. sugar
2 T. brown sugar
1/4 c. oil
3/4 c. applesauce
3 T. orange juice concentrate
1/2 t. GF vanilla
1 1/2 c. coarsely chopped cranberries
Grease 12 muffin cups or papers with oil. Preheat oven to 350 degrees F.
Whisk first six ingredients in a bowl. In a separate bowl, whisk eggs. Add sugars, oil, applesauce, concentrate and vanilla, whisking after each addition.
Stir in dry ingredients just until mixed in. Fold in cranberries. Spoon into muffin tin. Bake at 350 degrees for 18 - 21 minutes or until lightly browned and toothpick inserted in the middle comes out clean. Move to wire rack to cool. Refrigerate or freeze.
Enjoy and share!
Wednesday, November 30, 2011
Easy Cherry Pecan Chicken Salad
When you are wondering what to do with leftover chicken or turkey, here is a tasty yet simple way to make chicken salad with a hint of citrus. This is a very easy recipe to adjust with more or less dressing, fruit, etc. to make it how you like it. Yum!
Cherry Pecan Chicken Salad Print Recipe
1/4 c. plus 1 T. mayonnaise
1 1/2 T. orange juice concentrate
1/4 t. basil
1 1/2 c. of cooked and diced chicken or turkey
2 T. chopped dried cherries
2 T. chopped pecans, toasted if desired
2 T. finely chopped celery
dash of salt as desired
In small bowl, combine mayonnaise, concentrate and basil. Mix until smooth.
In a medium bowl, combine remaining ingredients and mix. Pour dressing over and stir until all ingredients are covered.
Enjoy with greens as a salad or on a sandwich. If preferred, mix together all ingredients together except for the chicken and spread over slices of meat on a sandwich. Serves 3 - 4.
1/4 c. plus 1 T. mayonnaise
1 1/2 T. orange juice concentrate
1/4 t. basil
1 1/2 c. of cooked and diced chicken or turkey
2 T. chopped dried cherries
2 T. chopped pecans, toasted if desired
2 T. finely chopped celery
dash of salt as desired
In small bowl, combine mayonnaise, concentrate and basil. Mix until smooth.
In a medium bowl, combine remaining ingredients and mix. Pour dressing over and stir until all ingredients are covered.
Enjoy with greens as a salad or on a sandwich. If preferred, mix together all ingredients together except for the chicken and spread over slices of meat on a sandwich. Serves 3 - 4.
Wednesday, November 23, 2011
Gluten-Free Thyme Rolls For Thanksgiving Trial #4
The fourth trial is a winner! Though still heavier than a regular roll, it has a flavor that my family likes, it has a shape that I like, and it did raise well. I will continue to work on this recipe, but this is the roll I made for Thanksgiving this year. The first time I made this version of the recipe, the dough was a little stiffer. If you want your roll to have a little more formed, rounded shape, use medium sized egg whites or a T. less water. The roll will be a little more dense also.
Gluten-Free Thyme Dinner Rolls print recipe
1 package of yeast (2 1/4 t.)
2 T. sugar
3/4 c. water (110 degrees)
2 egg whites
3 T. olive oil
3/4 c. brown rice flour
1/4c. plus 2 T. potato starch flour
2 T. cornstarch
2 T. almond flour
1/4 c. and 2 T. quinoa flakes
1 1/2 t. thyme
2/3 t. salt
2/3 t. baking powder
1 t. zanthan gum
Proof the yeast by mixing the yeast with 1/2 c. of the warm water and 1 t. of the sugar. Place in warm area to raise. It should almost double in 5 - 10 minutes if the yeast is working well.
Meanwhile, combine remaining sugar, all flours, cornstarch, quinoa flakes, thyme, salt, baking powder, and zanthan gum. Whisk dry ingredients until combined well.
Whisk egg whites in separate bowl until bubbly. Add yeast mixture, remaining water and olive oil and mix well. Whisk, stir or beat in dry mixture until combined well. Dough will be sticky. Cover with greased plastic wrap and let raise in warm area until doubled - about 1 hour.
Divide dough into 8 - 12 equal pieces. Use rice flour to help roll dough piece in a ball. Place each ball in a greased muffin tin. Make a small slit on the top of each roll with a sharp knife. Place in warm area until doubled, about 45 minutes. Brush top of rolls with egg wash (egg beat with a little water) if you wish and bake at 375 degrees for 15 - 18 minutes or until lightly browned on top. If you choose to make the rolls larger, you will need to bake them longer. Remove rolls from muffin tins and cool on rack. I store mine in the refrigerator or in the freezer.
Enjoy!
Gluten-Free Thyme Dinner Rolls print recipe
1 package of yeast (2 1/4 t.)
2 T. sugar
3/4 c. water (110 degrees)
2 egg whites
3 T. olive oil
3/4 c. brown rice flour
1/4c. plus 2 T. potato starch flour
2 T. cornstarch
2 T. almond flour
1/4 c. and 2 T. quinoa flakes
1 1/2 t. thyme
2/3 t. salt
2/3 t. baking powder
1 t. zanthan gum
Proof the yeast by mixing the yeast with 1/2 c. of the warm water and 1 t. of the sugar. Place in warm area to raise. It should almost double in 5 - 10 minutes if the yeast is working well.
Meanwhile, combine remaining sugar, all flours, cornstarch, quinoa flakes, thyme, salt, baking powder, and zanthan gum. Whisk dry ingredients until combined well.
Whisk egg whites in separate bowl until bubbly. Add yeast mixture, remaining water and olive oil and mix well. Whisk, stir or beat in dry mixture until combined well. Dough will be sticky. Cover with greased plastic wrap and let raise in warm area until doubled - about 1 hour.
Divide dough into 8 - 12 equal pieces. Use rice flour to help roll dough piece in a ball. Place each ball in a greased muffin tin. Make a small slit on the top of each roll with a sharp knife. Place in warm area until doubled, about 45 minutes. Brush top of rolls with egg wash (egg beat with a little water) if you wish and bake at 375 degrees for 15 - 18 minutes or until lightly browned on top. If you choose to make the rolls larger, you will need to bake them longer. Remove rolls from muffin tins and cool on rack. I store mine in the refrigerator or in the freezer.
Enjoy!
Monday, November 21, 2011
Fun Idea for Thanksgiving
Remember how easy it is to make meringue cookies? Add a little food coloring and you can make some fun pumpkins for an attractive table place setting or for a dessert platter.
Just make the meringue cookie recipe (skip the chocolate part), beat in a little food color at the end (paste is better than liquid for this) and use a cake decorating set or a zip baggie with the corner cut out. I used a cake decorating bag without a tip for the pumpkin part by making vertical curves/lines like the curves on a real pumpkin. A round tip was used for the stem and vines and I added leaves with a leaf tip.
Make as big a batch as you wish. Remember the basic porportion of 1/4 c. sugar, 1 egg white and 1/8 t. cream of tarter.
Mine ended up to be about 2 1/2 inches wide. Since these are a little bigger of a cookie, set oven on 225 degrees F and leave in the oven a little longer to dry out.
Have fun creating!
Just make the meringue cookie recipe (skip the chocolate part), beat in a little food color at the end (paste is better than liquid for this) and use a cake decorating set or a zip baggie with the corner cut out. I used a cake decorating bag without a tip for the pumpkin part by making vertical curves/lines like the curves on a real pumpkin. A round tip was used for the stem and vines and I added leaves with a leaf tip.
Make as big a batch as you wish. Remember the basic porportion of 1/4 c. sugar, 1 egg white and 1/8 t. cream of tarter.
Mine ended up to be about 2 1/2 inches wide. Since these are a little bigger of a cookie, set oven on 225 degrees F and leave in the oven a little longer to dry out.
Have fun creating!
Labels:
dairy-free,
gluten-free,
meringue,
pumpkins,
Thanksgiving
Friday, November 18, 2011
Gluten-Free Thyme Rolls for Thanksgiving Trial #2
Thanksgiving is a few days away. Planning a meal for a large group can be stressful if one or more have food sensitivities. I remember last year felt much harder. I didn't want anyone to feel left out especially a kid. It does require some planning especially if you are going to someone else's home.
I have always loved to bake especially making yeast products. I enjoy the challenge of baking gluten-free, but gluten-free baking with yeast is trickier. I became frustrated with it early summer and bought my bread for a while. Here we are at Thanksgiving and I decided I really wanted home baked thyme dinner rolls.
I was tired of putting in lots of eggs and water and decided I wanted my rolls to have a round shape without a mold. So, I looked up recipes and tried a combination of flours I thought my family would like. The dough was stiff, but it didn't raise well. Neither did trial #2. On the upside, the flavor was great and my kids loved them warmed with honey.
I am still trying to get my rolls to have a shape without a mold while having them be light inside with a flavor and texture my family likes. Three days to Thanksgiving.....
I have always loved to bake especially making yeast products. I enjoy the challenge of baking gluten-free, but gluten-free baking with yeast is trickier. I became frustrated with it early summer and bought my bread for a while. Here we are at Thanksgiving and I decided I really wanted home baked thyme dinner rolls.
I was tired of putting in lots of eggs and water and decided I wanted my rolls to have a round shape without a mold. So, I looked up recipes and tried a combination of flours I thought my family would like. The dough was stiff, but it didn't raise well. Neither did trial #2. On the upside, the flavor was great and my kids loved them warmed with honey.
| A work in progress |
I am still trying to get my rolls to have a shape without a mold while having them be light inside with a flavor and texture my family likes. Three days to Thanksgiving.....
Wednesday, November 16, 2011
Pan Fried Butternut Squash
| Butternut squash seed cavity -- a perfect heart! |
After it is cooled a little, it's so easy to scrape out of the shell and just smash with a fork. I still like mine with salt and pepper, but the rest of my family likes brown sugar and pumpkin pie spice in theirs. We started growing butternut squash last year and tried to think of other ways to use it. I know my mom used to bake with it - pies and bars. It is similar to pumpkin.
We heard that peeling, cubing, and roasting it was good. Since then, we have fried it in a pan and roasted it in the oven at about 425 degrees F. This is my husbands favorite way to eat the squash. It does get kind of soft in the oven. Broiling it may work better. We haven't tried that yet. Our favorite is in a skillet at a high temperature, so it browns without getting too soft too quickly. Check it out. It's simple with olive oil and crushed tyme. Although this recipe is easy to change for how much it makes, it does work better when there is only one layer of squash in the skillet.
Pan Fried Butternut Squash
2 T. olive oil
1 1/2 t. crushed dried rosemary
1/2 t. salt
pepper to taste
6 c. butternut squash, cubed and peeled
Pour 1/2 T. of olive oil in the skillet and turn the stove to high. Mix the rest of the ingredients in a bowl and pour mixture into the pan. Be cautious with the high temperature. Turn squash occasionally when it starts to brown. Flip gently scraping under the squash to avoid tearing the pieces. Cook until browned and softened but firm, about 15 minutes.
My mother always makes it the traditional way for Thanksgiving because that's the way her grandchildren like it, but here is another option for a tasty vegetable for the Thanksgiving table.
Wednesday, November 9, 2011
Quinoa Chicken Soup With Gluten-Free Dumplings
We're having another cold fall day where a bowl of soup sounds perfect for lunch (or dinner). Soup is definitely a comfort food for me. And since I really enjoy both the taste and nutritional benefit of quinoa, I tried it in my favorite soup. You could use rice instead, but I've gotten so used to it this way, I couldn't imagine eating it the way it was before with the rice. This is a light, yet filling soup. Make it more hearty by adding dumplings or extra meat and quinoa.
Quinoa Chicken Soup With Dumplings print recipe
1 T. olive oil
1/2 c. chopped onion
3/4 c. chopped celery
5 c. chicken broth
1 1/2 c. chopped carrot
2 t. tarragon
1 1/2 - 2 c. cooked quinoa
1 - 1 1/2 c. diced cooked chicken
2 1/2 T. cornstarch
2 1/2 T. water
dumpling batter, if desired
Heat olive oil in large soup pot on medium heat. Saute onion and celery for 5 minutes. Add broth, carrots, tarragon and quinoa. Bring to boil and simmer on low/medium for 15 minutes. Meanwhile, mix water and cornstarch together until dissolved, prepare chicken, and lastly, make dumpling batter, if desired.
Stir cornstarch liquid into hot broth. Add chicken. Simmer until chicken is heated through and serve, or make dumplings. To make dumplings, see linked recipe or use your own recipe. Drop dough by teaspoonfuls into hot soup and simmer on low for 20 minutes, keeping covered. Serve soup, but allow it to cool a little before eating. Serves 6-8.
Notes: I like to make my broth from scratch. I usually end up with about 5 cups of broth, which is the reason for using 5 cups in the recipe. Adjust the recipe as needed with the amount of broth you have. I use my leftover quinoa, but you should be able to cook quinoa in the broth just like you can rice. I would simmer it at least twice as long.
Enjoy!
Quinoa Chicken Soup With Dumplings print recipe
1 T. olive oil
1/2 c. chopped onion
3/4 c. chopped celery
5 c. chicken broth
1 1/2 c. chopped carrot
2 t. tarragon
1 1/2 - 2 c. cooked quinoa
1 - 1 1/2 c. diced cooked chicken
2 1/2 T. cornstarch
2 1/2 T. water
dumpling batter, if desired
Heat olive oil in large soup pot on medium heat. Saute onion and celery for 5 minutes. Add broth, carrots, tarragon and quinoa. Bring to boil and simmer on low/medium for 15 minutes. Meanwhile, mix water and cornstarch together until dissolved, prepare chicken, and lastly, make dumpling batter, if desired.
Stir cornstarch liquid into hot broth. Add chicken. Simmer until chicken is heated through and serve, or make dumplings. To make dumplings, see linked recipe or use your own recipe. Drop dough by teaspoonfuls into hot soup and simmer on low for 20 minutes, keeping covered. Serve soup, but allow it to cool a little before eating. Serves 6-8.
Notes: I like to make my broth from scratch. I usually end up with about 5 cups of broth, which is the reason for using 5 cups in the recipe. Adjust the recipe as needed with the amount of broth you have. I use my leftover quinoa, but you should be able to cook quinoa in the broth just like you can rice. I would simmer it at least twice as long.
Enjoy!
Subscribe to:
Posts (Atom)