Saturday, October 6, 2012

Zucchini Spice Cake

Zucchini works so well in cakes, breads and muffins because it makes the product nice and moist. I do like making chocolate zucchini bread and muffins, but I wanted to make a version with some spices that reminded me of fall. This recipe is really a sweet bread, but has a really nice texture and reminds me of cake. I also like to make muffins because it works well in lunches for us. I made this recipe into 12 muffins and an 7 x 7 inch cake.

Zucchini Spice Cake

3 eggs
1 1/2 c. sugar
2/3 c. oil
2 t. vanilla
2 c. grated zucchini, unpeeled
1 3/4 c. brown rice flour
1/4 c. tapioca flour
1/2 c. potato starch
1 t. zanthan gum
1 t. baking powder
1 t. baking soda
1/2 t. salt
3 t. cinnamon
1/2 t. cloves
1/2 t. allspice
1/4 c. walnuts, chopped
2 t. brown sugar

Whisk eggs until foamy. Add sugar, oil, vanilla and zucchini. Whisk dry ingredients together, except for walnuts and brown sugar, and stir into egg mixture until combined. Line  20 - 24 muffin cups with paper or grease two 7 or 8-inch pans. Fill muffins cups about 2/3 full or pour into pans. Sprinkle tops with brown sugar and walnuts. Bake at 350 degrees for about 18 - 22 minutes for cupcakes and about 20-28 minutes for cakes (time depends upon pan used) or until a toothpick inserted comes out clean. Cool on rack. Serve warm or cold. Refrigerate (up to one day) or freeze leftovers.

Moist and delicious...Enjoy!

Friday, September 21, 2012

Black Bean Salsa

Although I like salsa in general, I especially enjoy the time of year where red, ripe tomatoes are plentiful and I can make fresh salsa. There's just something about fresh tomato, pepper and onion with the appropriate seasonings. Salad on a chip.

In the winter, it's harder to find decent tomatoes and to be quite honest, I was getting a little tired of so many tomatoes at the end of the season this year. I wanted to try something different with my husband's salsa recipe. I had tried black bean salsa a couple of times and really enjoyed it, but didn't prefer the corn in the recipe. I decided to add just black beans to our fresh salsa recipe and cut down on the tomatoes. My husband and I were really pleased with how it turned out...less acidic with protein added.

Black Bean Salsa

1 1/2 c. chopped roma tomatoes
1 (15 oz.) can of black beans
1/4 c. chopped onions
1 - 2  garlic cloves, finely chopped
1 small yellow pepper, chopped
1/2 small red pepper, choppped
finely chopped hot pepper of choice, as desired
1/3 c. chopped fresh cilantro
juice of 2 limes
2 t. cumin
3/4 t. salt


Combine vegetables and beans. Sprinkle with cilantro and seasonings. Toss gently to combine. Refrigerate for several hours before serving to combine flavors.

We love this combination of flavors and the salsa is more satisfying with the beans in it. Enjoy!


10/6/12  Note:  "Pepper to taste" was not part of our original recipe and was put in by mistake. I removed it from the recipe above. Add it if you wish.


Friday, August 31, 2012

Gluten-Free Rhubarb Muffins

One of my favorite things I look forward to in late spring is the start of rhubarb season. I love the tangy flavor in my baked goods. This recipe is an easy cake-like muffin with rhubarb that my family enjoys. I added brown sugar and nuts for a little crunch on top. Yum!

Rhubarb Muffins

1 c. brown rice flour
1/4 c. tapioca or potato starch
3/4 t. baking soda
3/4 t. baking powder
1/4 t. salt
1/2 t. cinnamon
3/4 t. zanthan gum
3/4 c. brown sugar

1 egg
1/2 c. applesauce
1/3 T. milk
1 t. vanilla
1 t. lemon juice
1/4 c. canola oil

1 1/3 c. diced rhubarb
2 t. brown sugar
3 T. chopped pecans

Whisk the first seven (dry) ingredients in a small bowl. Whisk egg in a large bowl. Whisk in applesauce and milk, one at a time. Whisk in vanilla, lemon juice and oil. Add dry ingredients and stir just until combined. Fold in rhubarb.

Grease 14 - 16 muffin cups or use papers. Fill cups about 2/3 full with dough. Sprinkle dough with brown sugar and pecans. Bake at 350 degrees for about 17 min. or until toothpick inserted in the middle comes out clean. Cool on rack.

If you won't be eating the muffins that day, refrigerate for 1-2 days or freeze in a sealed container. Frozen muffins work great for school or work. Put it in a bag or container and it's thawed out by the time you need it - although my kids love frozen muffins.

Enjoy!


Tuesday, July 31, 2012

Saving Money Gluten-Free

Guten-free products can be quite expensive. That's why I like to make as many items homemade as I can. But, GF flours ares still costly compared to regular flour.

I wanted to start making my own flour to save money - particularly brown rice flour (a staple of mine) and quinoa flour (I like the fact that quinoa is a complete protein). Investing in a grain mill was one option, but since I decided to buy a Vitamix (a high powered blender) to increase my families intake of fruits and vegetables, I decided to try their dry blade container instead for grinding grain. I have had success with my brown rice and quinoa flour. If you bake a lot, making your own flour definitely helps reduce costs. Research your options to make the best choice for you.

You may also find gluten-free flours cheaper at Asian markets in your area. A friend of mine found tapioca starch, potato starch and white rice flour considerable cheaper at a local Asian market.

Making your own mixes saves money, too. It's easy to do and makes baking more convenient when your time is limited. Simply mix your dry ingredients together well in a bowl and store in a sealed bag. You can put it in the refrigerator or freezer if you are not going to use it right away. I like to look at product labels to find out ingredients in my favorite purchased foods, guess their quantities and try to make the item from scratch. Challenging yet fun!


Friday, June 29, 2012

Perfect Time For Ice Cream

School is out and we have settled into summer. One thing my kids love is ice cream - a bit of a challenge without milk. Since we like the flavor of coconut milk, it works as a great alternative for cream for us. It's easy to make a simple chocolate or vanilla ice cream with coconut milk.

This recipe is a lighter version of ice cream with lots of strawberries in it. The coconut milk makes it creamy.

Dairy-Free Strawberry Ice Cream

1 1/2 lb. strawberries, frozen
1 - 14 oz. can of coconut milk
      (regular)
1/4 c. orange juice
1/2 c. sugar
1 t. vanilla

If you own a high powered blender, blend all ingredients per instructions on your machine, adding a little more liquid if needed. Mixture should hold its shape and be thick. Serve or freeze right away.

If your blender is not able to make soft serve consistency from frozen fruit, use fresh, or partially or fully thawed strawberries. You can then use an ice cream maker to freeze it or pour it into a container and put in the freezer, stirring every 1/2 to 1 hour until frozen. When using the pan method, blending the ice cream again when it's frozen but still a little soft will give it a smoother texture by breaking up the ice crystals. If the ice cream becomes too firm to blend, let it melt a little rather than add more liquid before blending it.

Notes:  If your ice cream is not as smooth as you would like, you can blend the fresh, or partially or fully thawed strawberries first and strain them to remove the seeds before adding the rest of the ingredients. This should not be necessary with a high powered blender.


Monday, May 7, 2012

More Cupcakes

A couple of weeks ago, I shared a lemon cupcake recipe. This week I want to share a recipe for cupcakes (should work for cake also) that works as a yellow/white cake mix would. And this recipe is very easy to make into a mix to have ready ahead of time. Just put all of the dry ingredients in a bowl and whisk well. Store in a sealed bag or container. This recipe is an adaptation of two recipes from the same site I used a couple of weeks ago:  http://glutenfreegoddess.blogspot.com/. I used a combination of the vanilla cupcakes and orange creme cupcakes.

Vanilla Cupcakes

3/4 c. plus 2 T. brown rice flour
3/4 c. plus 2 T. tapioca flour
3/4 c. plus 2 T. sugar
1/2 t. sea salt
1 t. baking powder
1 t. baking soda
1 t. xanthan gum

1/4 c. egg whites
     (room temperature)
1 c. coconut milk
     (or other non-dairy
     milk beverage)
2 T. canola oil
1/2 T. vanilla
1/2 t. lemon juice

Whisk dry ingredients in small bowl. Set aside.

Beat egg whites in large bowl until stiff peaks form. Mix the rest of the wet ingredients in slowly just until combined. Add dry ingredients and mix on low just until blended. Don't over mix.

Fill 14 - 16 greased muffin cups or muffin papers. Smooth tops with fingers. Bake at 350 degree F for 18 - 21 minutes or until a toothpick inserted in the center of the cupcakes comes out clean. Cool on rack. Frost if desired. Store in refrigerator for 1 - 2 days or freeze.

Note:
I use a coconut milk beverage and since it's fairly thick, I have good luck with using 3/4 c. of the milk with 1/4 c. water. Don't add water to a thin milk.

The original recipes made 12 cupcakes. I like to make my cupcakes smaller. You may prefer to make them larger.

If you like chocolate, the following frosting pairs well with this recipe.


Fudge Frosting

1 c. dairy-free chocolate chips
2 T. shortening or dairy-free margarine
5 T. dairy-free milk
1 c.. powdered sugar

Put chips, shortening and milk in microwave safe bowl. Microwave at 50% power for 1 minute. Stir. If needed, continue to microwave at 30 second intervals stirring in between until chips are melted. Whisk in powdered sugar and cool. Refrigerate to decrease cooling time if desired, but remember frosting will be stiffer when cold. When mixture is cooled and thickened, beat until fluffy, adding more milk to reach desired consistency. Spread or pipe onto cupcakes with decorator bag.

Enjoy!


Wednesday, April 25, 2012

Homemade Taco Seasoning

Spice mixes can not only be costly, they can contain ingredients you don't want to consume such as diary, gluten, artificial ingredients or preservatives. When the store I used to get my taco seasoning from switched the seasoning to one with maltodextrin, I decided to try to make my own. How hard could it be, I thought. And it wasn't. The kids didn''t even seem to notice the difference. This recipe replaces one packet of taco seasoning. Alter to your own taste.


Homemade Taco Seasoning

1 T. chili powder
1/2 t. garlic powder
1/2 t. onion powder
1/8 t. crushed red pepper flakes
1/4 t. dried oregano
1/2 t. paprika
1 1/2 t. ground cumin
1 t. sea salt
1/4 t. black pepper
1/3 t. cornstarch

Combine all ingredients thoroughly.


Enjoy!


Friday, April 20, 2012

The Quest for Gluten-Free Cake

    In my attempt to make a GF light cake for celebrations, I've tried to make it from scratch and I've used cake mixes (hoping for a lighter cake). The mix for my daughter's birthday was still quite heavy. I took a break from making cake for a while. Then I needed to make a cake for Easter this year, since there are a bunch of April birthdays in my extended family and everyone would be together. So, I started making cake recipes again.

I leaned a few things. Using beaten egg whites seemed to help make the batter lighter. Over beating seemed to make the cake tougher. I decided to make a cake using cupcakes since smaller portions of GF dough seem to rise better. And in the end the Easter birthday (cupcake) cake was a success and I now have a couple of cupcake recipes I really like. I didn't try them as a cake yet, but that should work.

I found some great recipes at http://glutenfreegoddess.blogspot.com/. The following cupcake recipe was adapted from her gluten-free Orange Creme Cupcake recipe. It's a cross between angel food and sponge cake and is airy and light. The original recipe is also vegan.


Lemon Cupcakes

3/4 c. brown rice flour
3/4 c. potato starch
3/4 c. plus 2 T. sugar
1 t. baking powder
1/2 t. baking soda
1/8 t. salt
1 t. zanthan gum
1/4 c. egg whites, room temperature
2 T. canola oil
1/4 c. lemon juice
3/4 c. coconut milk
     (or other non-dairy milk beverage)
3/4 c. powdered sugar
1 T. lemon juice
additional water as needed
dash of stale turmeric
lemon zest

Whisk flours, sugar, baking powder, baking soda, salt and zanthan gum in a small bowl. Set aside.

Beat egg whites until stiff peaks form. Add oil, 1/4 c. juice and non-dairy milk and mix liquids together briefly at slow speed. Gently stir in dry ingredients and beat at medium speed just until blended.

Fill 16 muffin papers with dough and smooth tops with the back of a spoon or wet fingers. Bake at 350 degrees F for 17 - 20 minutes or until a toothpick inserted in the middle of a cupcake comes out clean. Cool cupcakes on rack.

Mix 1 T. lemon juice with powdered sugar and turmeric. Add drops of water until desired consistency. Spread on cupcakes. Remember a soft frosting will continue to spread after you put it on. Add zest on top, if desired.

Note: Stale turmeric should not change the flavor of your frosting. It is a natural way to color the frosting yellow. Food coloring can be used instead. The amount of egg does seem to matter for the texture, so I measure it. One medium to large egg white is about 2 T.

The light texture and glaze-like frosting goes great together and is a favorite here. A taste of spring!

Wednesday, April 11, 2012

Experimenting With Natural Food Colors

It was fun using various foods to color my Easter cookies naturally this year. I chose a macaroon cookie made with egg whites. The colors were overall successful, but I think the liquid did cause the cookies to flatten some (although there were some other factors).

I tried a variety of natural colors. I tried collecting juice from frozen berries that were thawed, but since I was using small amounts that didn't always work. I did use a strainer for some, but then you get some pulp and that may not work for some things. The best way is probably to use cheese cloth, if possible, to just get the juice.

Raspberry - I expected a light pink, but ended up with a purple. I used the juice from thawed berries.

Turmeric - Mine was old but still had a smell. It didn't seem to affect the cookies right away, but I thought I detected a difference after a few days. Turmeric made a very nice bright yellow.

Blueberry - This made a bluish purple.  I ended up using a strainer for this one. I did not try blueberries and blackberries together (supposed to make raspberry purple).

Carrots - Although shredded carrots seem to have the potential to stain my counter top orange, they did not produce enough juice to attempt to color my cookies. That idea will need more work since I do not have a juicer.

Blackberries - This was my favorite color which I would describe as a violet, or a soft purple.

Strawberries - I did get my pink after cutting out the white inside of the thawed berry and using the berry after straining.

It was fun and easy to experiment with natural colors from food.

Thursday, April 5, 2012

Hot Cross Buns

I tried making gluten-free hot cross buns and they raised well but didn't quite have the texture I was hoping for. They were edible, but not quite worthy of posting for Easter this year.

If you are interested in making hot cross buns, try using your favorite yeast roll recipe and add a little extra sugar and fat, some dried fruit (raisins, currents, dates) and your favorite spices (we like cinnamon and cardamom with a little nutmeg and allspice). I used muffin tins since that size works nice for us. Don't forget to brush the tops with a beaten egg before baking for that shiny appearance. And, of course, finish off with a cross of white icing (powdered sugar, water and vanilla, if desired).

Saturday, March 31, 2012

Easter Traditions

Easter is just a week away. It's time to start planning food. Hot cross buns are a fun tradition. I don't have a gluten and dairy-free recipe yet, but plan to work on one this weekend.

And maybe some bright colored cookies. One of the challenges I wanted to work on was using various foods for natural food color. So, for the cookies, I'm going to try the following colors:

purple: blackberry with blueberry juice
pink: raspberry juice
orange: carrot juice
yellow: stale turmeric

This will be fun to try. I'll have to see how much I need. It could change the texture of the cookie. Beets and avocado also sound like interesting options for another time. What natural food colors have you made?


Thursday, March 29, 2012

Quinoa Ideas

So much has been said about the health benefits of quinoa, a complete protein. I enjoy eating it just cooked with a little salt and pepper. But if you are really interested in the small seed, you may be looking for other ideas.

I have eaten quinoa flakes as a cooked cereal. It does have a somewhat bitter flavor, but with a little maple syrup, cooking it with fruit juice or adding a little fruit sauce, I enjoy it. It is a much softer texture than oatmeal. The flakes can also be used in cookies. You can use quinoa flour by adding it to pancakes, cookies, etc. Again, it has a different flavor, so my family enjoys it in small amounts.

We enjoy cooked quinoa seeds the most. I have made a pilaf with it, served it like rice, and added it to soup. I have heard it's good in chili, but have not experimented with that yet. For breakfast, I like to eating it with a scrambled egg. I fry an egg, breaking the yolk and scrambling it. When it is still a little soft, I add a 1/2 cup of cooked quinoa and desired seasonings, and finish cooking the egg while warming the quinoa. It's sort of like a stir fry, heavy on the egg. You could add veggies like zucchini, pepper and onion.

Quinoa also makes a great cold salad. I posted one of my favorites a few weeks ago - Meditteranean Quinoa Salad. It's a beautiful colorful salad that works great for parties and potluck.

If you haven't eaten quinoa yet, give it a try.

What other ways do you use quinoa?

Saturday, March 24, 2012

Cookies for Breakfast

While cookies for breakfast doesn't sound quite right, imagine a cookie with lots of rolled oats, nuts and dried fruit and enough egg,sugar, oil and flour to stick it all together. Made into 3 - 4 inch rounds, these cookies have great flavor and are slightly chewy. With all of the oats, nuts and dried fruit in them, there are sort of like granola and could reasonably be eaten for breakfast.

This recipe was adapted from an oatmeal raisin cookie recipe by Cal Schroeck from Allrecipes.com with a high ratio of oats to flour. I was also impressed that the recipe used oil instead of a solid fat.

Breakfast Cookies

1 1/2 c. rolled oats (gluten-free if needed)
1/3 c. brown rice flour
2 T. potato or tapioca starch
1/3 t. zanthan gum
1/4 t. baking soda
1/2 t. cinnamon
1/8 t. salt
1/4 - 1/3 c. packed brown sugar
1/3 c. canola oil
1 large egg
3/4 t. vanilla
1/2 c. chopped walnuts
1/4 c. chopped dried cranberries
     (or any dried fruit)
2 T. mini chocolate chips (dairy-free if needed)


Combine oats, flours, zanthan gum, baking soda, cinnamon, and salt in a medium bowl and mix well. In a separate bowl, whisk oil, egg and vanilla. Stir in dry ingredients. Add nuts, dried fruit and chips and mix until everything is sticky. Dough will "sort of" stick together. Divide dough into 12 parts. Spoon each part, about golf ball size, onto a greased cookie sheet and press dough into cookie shape about 1/2 inch thick. Cookies will grow little during baking and will seem like they will not stay together, but they will. Bake at 350 degrees F for about 10 - 12 minutes or until edges start to brown. Don't over bake. Wait 2 - 3 minutes and remove to rack to cool.

Notes:
If you start having trouble shaping your cookies because the dough is sticking to your hands, try washing your hands so they are not sticky. We like our cookies with just 1/4 c. brown sugar, but to some people that may not be very sweet. If desired, shape your cookies into bars.

Whether you sneak one at breakfast or eat one for snack, these cookies are delicious and nutritious.

Friday, March 16, 2012

Thicker Yogurt

We enjoyed the fruit smoothies so much last week I just had to try to make yogurt again. I wanted to get a thicker yogurt that I could serve in a dish with fruit. Success! What did I do different?


  1. I was careful to sterilize all utensils and items that would touch the cooled coconut milk.
  2. I used one can of regular (full fat) coconut milk and the rest was a milk beverage from a carton to make 5 cups.
  3. I made sure to mix the gelatin, honey and starter in well at the appropriate times.
  4. I used 2 packages of unflavored gelatin instead of one.
  5. I was careful to lower the temperature of the coconut milk to 95 - 100 degrees F before adding the yogurt starter.
  6. I still used the purchased vanilla coconut yogurt as a starter, but I used more - about a 1/4 c for 5 c. of coconut milk. I have not found a yogurt starter at a local store yet.
  7. I make sure that I had a sterilized container to mix a small amount of the coconut milk with the starter before adding it to the rest of the milk.
  8. I still ran the machine for about 10 hours.
It's delicious in shakes or just in a dish with a little cooled berry sauce (also delicious on pancakes) or other sweetener as desired. See below for the recipe.


Triple Berry Sauce


3/4 c. water
3 c. frozen raspberries,
      blueberries and
      blackberries (divided)
4 T. sugar or 3 T. agave
2 T. cornstarch
2 T. water


Mix cornstarch and 2 T. water until well blended and set aside. Bring 3/4 c. water and 1 c. fruit to boiling. Stir in sweetener. Add cornstarch mixture slowly to boiling fruit stirring constantly. Remove thickened sauce from burner and add the rest of the frozen fruit stirring into sauce. Let sauce sit to thaw fruit. Heat on low if a warmer sauce is desired.


For more ideas and instructions for coconut milk yogurt check:  http://www.smallfootprintfamily.com/2009/04/25/homemade-coconut-milk-yogurt/


Saturday, March 10, 2012

Quick and Easy Fun Dessert

When Chas needed to make a dessert for Boy Scouts, he wanted something simple yet super yummy (they were being judged). He picked peanut butter and chocolate since it is a favorite combination for many including him. We came up with a simple layered bar, even using a box mix for the bottom although you could use your favorite cookie recipe. The end result was delicious even though he didn't win.

Easy Peanut Butter Chocolate Bars

One box of your favorite
     gluten-free cookie mix
     (or a favorite recipe)
1 c. creamy peanut butter
3/4 c. powdered sugar
1 T. dairy-free margarine
1/4 c. crushed gluten-free cereal
6 oz. dairy-free chocolate
3 fluid oz. coconut milk, full fat
chopped peanuts

Prepare your favorite gluten-free cookie mix or recipe according to directions. Any cookie that goes well with peanut butter and chocolate and is appropriate for a bar should work. He used Betty Crocker chocolate chip cookie mix.  You can use dairy-free margarine. Spread in a 9 x 13 in. pan (lightly grease bottom). Ours was just a thin layer of dough, just the thickness of the chips. Bake for about 15 minutes at 350 degrees F or until lightly browned and a little soft in the middle yet (it will depend upon the thickness and type of your cookie). Don't over bake or cookie will be dry. Let cool.

Mix peanut butter, sugar, margarine and cereal. Spread over cooled cookie. Increase ingredients proportionately if you prefer a thicker layer.

Blend coconut milk before using if it has separated. Melt chocolate and coconut milk together in the microwave at 50 % power, stirring every 30 seconds. Cool to room temperature. Stir well and pour evenly over peanut butter. Sprinkle with nuts, if preferred. Let set and cut into squares. Store in refrigerator  for 1 - 2 days or freeze.

The topping is like a peanut butter cup, so it's like eating candy. It's a great one to take to a pot luck where you'll be "sharing" with a lot of other people. Enjoy!


Wednesday, March 7, 2012

I Want Yogurt


Growing up on a dairy farm, we consumed plenty of milk, cheese and yogurt (and ice cream). Not being able to tolerate dairy well now has been a challenge. We found milk beverages we liked and started making homemade ice cream, but we went without yogurt. Yogurt was always a main ingredient in our fruit smoothies. We made them without, but I missed it.

Since we really enjoyed coconut milk ice cream, I started looking for information on how to make coconut milk yogurt. Coconut milk yogurt in our local store is very expensive. In my teens, I used to make homemade yogurt with regular milk and plain yogurt for starter, and I still had the yogurt maker. So, I decided to give it a try. I remembered a little from when I used to make yogurt, but I searched for more information to refresh my memory and to learn how to make it with coconut milk. This particular site had loads of info on it:  http://www.smallfootprintfamily.com/2009/04/25/homemade-coconut-milk-yogurt/ and is great to get started with. It gives a suggestion on how to make yogurt without a yogurt maker.
So, I got started. From my previous yogurt making days, I remembered heating the "milk" to about 180 degrees F and lowering it to 95 - 100 degrees F when adding the starter as mentioned in the recipe listed above. Sterilizing everything was necessary and I used my yogurt maker. I added a T. of honey for sweetener along with a packet of unflavored gelatin to my 5 cups of "milk". I did not have the probiotics mentioned, so I bought a 6 oz. vanilla coconut milk yogurt (they didn't have plain) and used it as a starter like I used to with dairy yogurt. This is generally not recommended and I am still searching for a dairy-free probiotic starter in my local stores. I chose to run the machine for about 10 hours and then put the yogurts in the refrigerator overnight.


I tried a yogurt in the morning. It was very runny and a lot of watery liquid separated out of it as you can see in the picture. It tasted good, but I threw it away thinking it didn't work at all and no one would eat it. I hestitated to throw away the rest of them and put them back in the refrigerator. Then I decided to make a fruit smoothie using the whole jar of "yogurt", a handful of frozen strawberries and a banana. Delicious! I did not throw anymore away.

Since I used a coconut milk beverage the first batch, I am going to try adding regular coconut milk and more gelatin, and be a little more careful with the temperature (it got a little low) and see what happens before I write a recipe. Meanwhile, I think I'm on to something that we are really going to like.


Saturday, March 3, 2012

Still Crazy For Quinoa

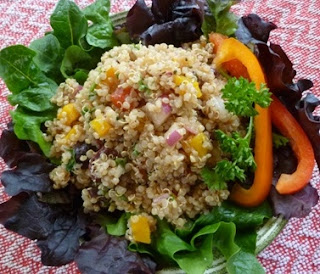
Quinoa is one of my favorite grains, and being a complete protein, it's considered a super food by some. Shortly after being introduced to quinoa for the first time and loving it, I decided to try to make a salad with it. Mediterranean food is on my favorites list, so I headed in that direction. This easy salad has a simple dressing and is easily altered for personal preferences. See below for suggestions. It tastes delicious the next day, so it's great for a make ahead potluck or lunch.

Mediterranean Quinoa Salad

2 c. water or vegetable broth
1 c. rinsed uncooked quinoa
1/3 c. chopped red onion
1 medium yellow pepper, chopped
1 medium tomato, seeded and chopped
1/2 c. chopped kalamata olives
3 T. chopped fresh parsley
1 t. dried crushed basil or
     1 T. chopped fresh basil
1-2 cloves of garlic, minced
1/3 c. lemon juice
1/4 c. olive oil
1/4 c. balsamic vinegar
sea salt, to taste
pepper, to taste

Cook quinoa according to package directions using water with 1/4 t. salt or broth and quinoa. Scoop into a bowl and gently mix in onion, pepper, tomato, olives, parsley, basil and garlic. In a separate cup, combine lemon juice, oil and vinegar. Pour over salad and mix. Salt and pepper to taste.

Refrigerate for at least 4 hours or overnight before serving to blend flavors. Serve on mixed greens if desired.

Variations:
  1. Add chopped cooked chicken to the salad.
  2. Add 1/2 c. cooked asparagus cut in 1 inch pieces.
  3. If you eat dairy, add 1/4 - 1/2 c. feta cheese or use appropriate alternative.
  4. Cucumber is a nice addition to this recipe also. I add it at the end and just to the part of the salad that will be eaten since it doesn't keep as well as the rest of the salad.
Enjoy!


Wednesday, February 29, 2012

Easy and Creamy Non-Dairy Ice Cream

Ice cream can be a perfect treat alone, with fruit or your favorite dessert. If you cannot tolerate dairy, the choices in the store are much more limited and expensive. Coconut milk makes really good ice cream. It's super creamy with just a light coconut flavor. Besides, the fat in coconut milk has been shown to be a good fat. And if I make it myself, it's much more economical.

Easy Vanilla Non-Dairy Ice Cream

1 can coconut milk (13.5 oz.,
     regular not light)
1 tsp vanilla
1/3 c. sugar

Blend ingredients well in a blender and freeze in an ice cream maker or in an 9 x 13 pan.

If using the pan, freeze 2 - 3 hours or until just a little soft in the middle. If you freeze too long, just let it warm up and soften a little. Blend again just enough to make the ice-cream smooth. It may need to be frozen again before serving.

Store in air tight container in freezer. It gets fairly hard when frozen for extended periods of time. Let thaw a little before serving.

Notes:
  1. Agave may be substituted for the sugar. Use 1/4 c.
  2. Try making chocolate ice cream. Add 1/4 c. cocoa to the blender in the beginning. If desired, increase your sweetener.
Enjoy!

Monday, February 27, 2012

The Power of a Smile

One of the easiest things to give another person is a smile - a sincere, heartwarming smile. Whether it's someone we know or not, it can change a person's day and shift it to a positive direction (including for the giver). They're simple, free and contagious. The challenge for the week:  See how many smiles you can share.

Friday, February 24, 2012

Keep Checking Those Labels

For those of us concerned about our nutrition, food labels are our friends. We want to know how much fat, sugar, protein, fiber, etc. Some of us want to know if the product contains gluten or dairy. Are the ingredients natural? There is so much we can check.

But whatever you choose to check on the labels--keep checking those same labels. It's easy to spot new products on the shelf. But, some of your favorite products may have been changed without a change to the outside of the container, bag or box.

It's great to see when companies change the colors, flavors or preservatives in their product to natural ingredients. I have seen wheat removed (it was a small percent) from a product and replaced with something else without a change to the box. More labels now clarify the ingredients (for example: stating what kind of maltodextrin they used).

So, recheck those labels periodically. You may be pleasantly surprised.

Thursday, February 23, 2012

My Favorite Dip

We are always looking for healthy and fun snacks at our house. Dipping veggies and chips/crackers is fun but the dip is not always healthy. And if you are avoiding dairy, making dip becomes more challenging.

That is why we love hummus - no dairy, but creamy and delicious with nutritional value. For us, getting the hummus really smooth really adds to its appeal. If your blender is not getting it creamy enough, try a food processor. I have used sesame seeds in this recipe instead of tahini (sesame seed paste). If you prefer to use tahini, see notes below.

Hummus
1 can (15.5 oz.) chickpea or garbanzo beans
reserve 1/3 c.  liquid from can
2 medium cloves of garlic, halved
3 T. olive oil
3 T. lemon juice
3 T. raw sesame seeds
1/4 - 1/2 t. salt

Blend beans, 2 T. of the reserved liquid, garlic, olive oil, lemon juice, sesame seeds and 1/4 t. salt in a food processor or blender. Add more liquid as needed to obtain a smooth, creamy dip. Add more salt as preferred.

Notes:
  1. I never seem to use a whole jar of tahini because I mainly use it for hummus, so I just put sesame seeds in my recipe. If you want to use the paste, omit the sesame seeds and add 1 1/2 - 2 T. tahini.
  2. Check the salt content of your garbanzo beans before adding salt to your recipe. Some cans contain more than others.
Variations:
  1. Omit tahini and sesame seeds. Some people, particularly children, don't like the sharp taste of tahini.
  2. Add chopped kalamata (Greek) olives or black olives after blending and sprinkle on top. Don't blend them. The resulting color is NOT appetizing.
  3. Adjust the lemon and or garlic to increase or decrease their intensity.
  4. Blend 2 - 3 T. of sun dried tomatoes with the other ingredients.
  5. Add 1/2 - 1 t. of cumin or a dash of cayenne pepper to spice it up.
Hummus goes great with chips, crackers and veggies. Our favorites are rice crackers, carrot sticks and pepper slices.

Enjoy!


Friday, February 17, 2012

Dark Chocolate Truffles

Besides being scrumptious, chocolate has a long and fascinating history. In ancient civilizations, cacao beans were ground and "chocolate" was consumed as a bitter drink with seasonings. The Aztecs even used cacao beans as money because of its perceived value at the time. The Spaniards brought cacao beans back to Europe and the chocolate drink was sweetened and enjoyed by the wealthy for hundreds of years. During the Industrial Revolution, chocolate became a solid confection that was affordable worldwide.

While I enjoy chocolate any time of the year, Valentine's Day and chocolate just seems to go together. So, this Valentine's Day I made a batch of one of my favorite chocolates - the truffle.

The truffle middle has a silky chocolate inside. They can be dipped in chocolate or rolled in cocoa, coconut, nuts, etc...  For many years, truffles were my Christmas tradition. Unfortunately, butter and cream are used with chocolate to make the creamy inside. I read that coconut milk can be used as a substitute. I tried it and everyone loved the new truffle. I use a can of regular coconut milk. Light just doesn't work as well nor does the coconut milk beverages sold in half gallons for drinking.

These are relatively simple to make but are somewhat time consuming since the chocolate has to be melted, mixed, solidified and rolled. The following recipe is the liquid/chocolate combination that worked with coconut milk to give me the truffle texture I love. Remember that the texture can vary with the brand of chocolate you use since different chocolates can absorb the coconut milk differently. Also, your truffle is only as good as your chocolate. If you want a fantastic truffle, use a fantastic chocolate. A wonderful dark chocolate flavor will not be masked by the coconut milk in this recipe. My favorite is Callebaut - a Belgian chocolate.


                              Dark Chocolate Truffles

                              6 oz. of dark chocolate, chopped
                              3 fluid oz. ( use measuring cup) plus 2 t. of coconut milk
                              chocolate, chopped nuts, coconut, and/or cocoa for dipping and rolling
      
Blend coconut milk from can to mix it well before measuring since it can separate in the can. Heat milk until almost boiling in saucepan or microwave. Pour over chocolate in heat safe bowl. Stir until melted. Cool chocolate. Use the refrigerator if desired, but cover chocolate to prevent it from picking up any odors and watch it carefully as it can get too stiff. When chocolate stiffens whisk, stir or beat it until it is fluffy and lightens in color. When stiff enough (refrigerate again if needed), roll in 1 - 1 1/4 in. diameter balls. Roll immediately in desired toppings. If you want to dip them in melted chocolate, place balls on wax paper first and let air dry for an hour or two, bringing them to room temperature. Roll in chocolate and let harden on wax paper. Place in paper candy cups if desired. Store covered in cool place. Makes 12 - 16 truffles.

Notes:
Pure chocolate contains cocoa butter and needs to be tempered to stabilize the cocoa butter and produce a firm hard chocolate. To avoid the need to temper chocolate, you can use confectionery coating in which the cocoa butter has been replaced by other fats. However, if you are avoiding dairy, many of these will not work for you. The real thing is better anyway and healthier, but you still need to check the label of the dark chocolate to make sure it does not contain dairy. Another option is to add 1 T. of shortening to 6 oz. of chocolate when melting it for dipping. Use the microwave at 50% power and stir every 1/2 minute just until it's melted. Always remember to keep moisture out of chocolate during the melting process so it doesn't seize up (thicken).

They make a beautiful gift if you can part with them. Yum.

Enjoy and celebrate Valentine's Day year round!

Saturday, February 11, 2012

Best Fish Sticks Ever

Around here the Friday Night Fish Fries are quite popular. Going out to eat isn't as easy as it used to be though. Last week the kids asked for fish sticks. Fish is not their most favorite food and they thought perhaps in sticks it would taste better. We had given up fish sticks years ago when trying to reduce processed food, before we were concerned about gluten. I decided to give it a try. I added a little starch and zanthan gum to brown rice flour and used GF bread crumbs and crushed Chex cereal for the coating. It took a couple of tries to get the proportions right, but I was told to always make fish this way.

Homemade Gluten-Free Fish Sticks

4-4oz. tilapia fillets (1 pound)
1/2 c. gluten-free flour blend (6 T. brown rice
     flour, 2 T. potato starch, 1/8 t. zanthan gum)
1/2 c. gluten-free bread crumbs
1 c. crushed rice/corn Chex
1/2 t. seasoned salt
1/2 t. garlic powder
1/2 t. onion powder
2 eggs, beaten


Remove excess moisture from fish as needed. Cut each fillet in 4 strips lengthwise. Prepare your flour blend and put on a large plate. Mix bread crumbs, Chex cereal and seasonings and put on another plate. Beat eggs in small bowl. Spray large cookie sheet with oil.

Roll each piece of fish in flour, then dip in egg and roll in crumb mixture.  Place in pan. Repeat with remaining pieces and arrange pieces so they are close but not touching.  I dip 2 - 3 pieces at a time. Spray tops of fish sticks with gluten-free canola oil spray.

Bake at 425 degrees F for 20 - 25 minutes until they are browned and the fish is flaky. The time will depend upon the thickness of your fillets. Fish sticks can be turned after 15 minutes if desired but is not really necessary. Serve with your favorite sauce.

Notes:
If gluten is not a concern, all-purpose flour and regular bread crumbs can easily be substituted for the non-gluten versions above. I make homemade bread crumbs by drying out bread scraps in a 250 degree F oven and crushing them. I was surprised to see that some store bought gluten-free "bread crumbs" appear to be flour based.

Wednesday, February 8, 2012

That Favorite Recipe

Did you ever have a favorite recipe that everyone seemed to like and was just so flexible and easy? That's how I feel about the banana bread recipe I wrote about in my first blog. I had lowered the sugar to 1/2 cup and made the bread into muffins. They always turn out so nice and since you don't need zanthan gum, I've give the recipe to others with a gift of rice flour so they can easily try a gluten-free recipe. It was the inspiration for other goodies along the way.


I picked up an idea to have the flavors of peanut and toffee with banana bread in a magazine while waiting for an appointment one day. Their recipe had yogurt, wheat flour and toffee bits in it, but I took the idea home and modified my favorite recipe one more time. It was a hit! See what you think.


Banana Peanut Muffins                    print recipe

1/2 c. packed brown sugar
1/4 c. dairy-free margarine
1 T. canola oil
2 eggs
1 t.  gluten-free vanilla
1 c. mashed banana
1 1/4 c. brown rice flour
3/4 t. gluten-free baking powder
1/2 t. baking soda
1/4 t. salt
1/4c. chopped peanuts
dairy-free mini chocolate chips and extra peanuts for decoration on top, if desired


Preheat oven to 350 degrees F. Line muffin tin with 12 papers and lightly spray.

Cream sugar, oil and margarine until creamy. Whisk in eggs and vanilla. Stir in banana.

Whisk remaining dry ingredients in a separate bowl before adding to banana mixture. Stir into banana mixture just until mixed. Spoon equally into muffin cups. Decorate tops with peanuts and chocolate chips, if desired.

Bake for 18 - 22 minutes or until toothpick comes out clean. Remove to rack to cool. Store in cool place for a day or wrap and freeze.


Note: Butter or margarine may be used in place of the dairy-free margarine if dairy is not a concern for you. No zanthan gum is required for this recipe.

Enjoy,


Friday, February 3, 2012

A Twist on Chocolate Chip Oatmeal Cookies

You don't have to be a kid to love a good cookie. A friend was telling me about a vacation five years ago where her and her husband received a cookie a day as a special treat. One of the cookies was so good, she saved the wrapper with the ingredient list, promising herself she would try to make something similar to that delicious treat. Just recently, she decided to give it a try and they turned out great. I converted the recipe to gluten and dairy-free and they turned out great, too. The cinnamon, lemon and ground oatmeal give these cookies a great flavor. See what you think.

Gluten-Free Chocolate Chip Oatmeal Cookies     print recipe

1/4 c. dairy-free margarine
1/4 c.  dairy-free shortening
1/2 c. brown sugar
1/2 c. white sugar
1 egg
1/2 t. vanilla
3/4 t. lemon juice
1 1/2 c. gluten-free rolled oats,
       blended to powder
1/2 c. brown rice flour
1/2 c. tapioca starch
3/4 t. zanthan gum
1/2 t. baking powder
1/2 t. baking soda
1/4 t. salt
1/2 t. cinnamon
1/2 c. dairy-free mini chocolate chips
     (or 3/4 c. regular size)
1/2 c. chopped walnuts

Cream the shortening and margarine with the sugars. Whisk in egg, vanilla and lemon juice until mixed well.

Whisk oats, flours, zanthan gum, baking powder, baking soda, salt and cinnamon in a separate bowl until combined. Add to egg mixture and stir until flour is combined. Add chocolate and nuts.

Form 1 inch balls and place 2 inches apart on an ungreased cookie sheet. Flatten about 1/2 way. Bake about 6 - 8 minutes depending if you want chewy or crunchy cookies. Cool 1-2 minutes and remove to rack to cool completely.

Happy cookie making.


Monday, January 30, 2012

Monday Challenge

I had to remind myself to think of things to be grateful for last week. It's so easy to think of the events not going as you expect them to. It was amazing how it made me feel to spend extra time focusing on the things I really appreciate. It was a reminder how my thoughts really affect how I feel.

It also feels really good to hear other people tell you how much they appreciate what you do for them. So, this week instead of just telling myself what I am thankful for, I am going to see how many times I can thank all the people who do things for me. It's so easy to take people for granted.

Friday, January 27, 2012

Party Time

One of the things I had a hard time with when removing dairy from recipes was coming up with dip to use for veggies and chips. Yes, dip is perfect for parties, but let's face it. Dip is just fun any old time and the healthier you make it the more you can eat it, right?

I love avocados...the taste, the creamy texture. And even though they are high in fat, a lot of it is monounsaturated fat (the "good" kind). I wanted an avocado dip that could work for veggies or chips. This one is very simple. Feel free to add more of your favorite flavors.


Fresh Avocado Dip          Print Recipe

2 medium avocados
     (peeled and cubed)
1/3 c. chopped tomato
     (skinned and seeded)
2 T. minced onion
1 large clove of garlic, minced
1 T. plus 1 t. lemon juice
1/2 T. olive oil
1/2 t. sea salt
1/8 t. pepper

Mash avocados in a bowl until creamy. Stir in remaining ingredients until blended. Refrigerate for at least 4 hours to blend flavors.

Note: If you wish to spice it up a bit for a party, try adding in 2 T. of GF mayonnaise and a dash of hot sauce (optional). Sprinkle two pieces of crumbled bacon on top. Definitely not as healthy but yummy.

Enjoy!